
Initial Tour Setup
Set up your first Matterport tour, validate key controls, and generate your first live embed from the Tours page.
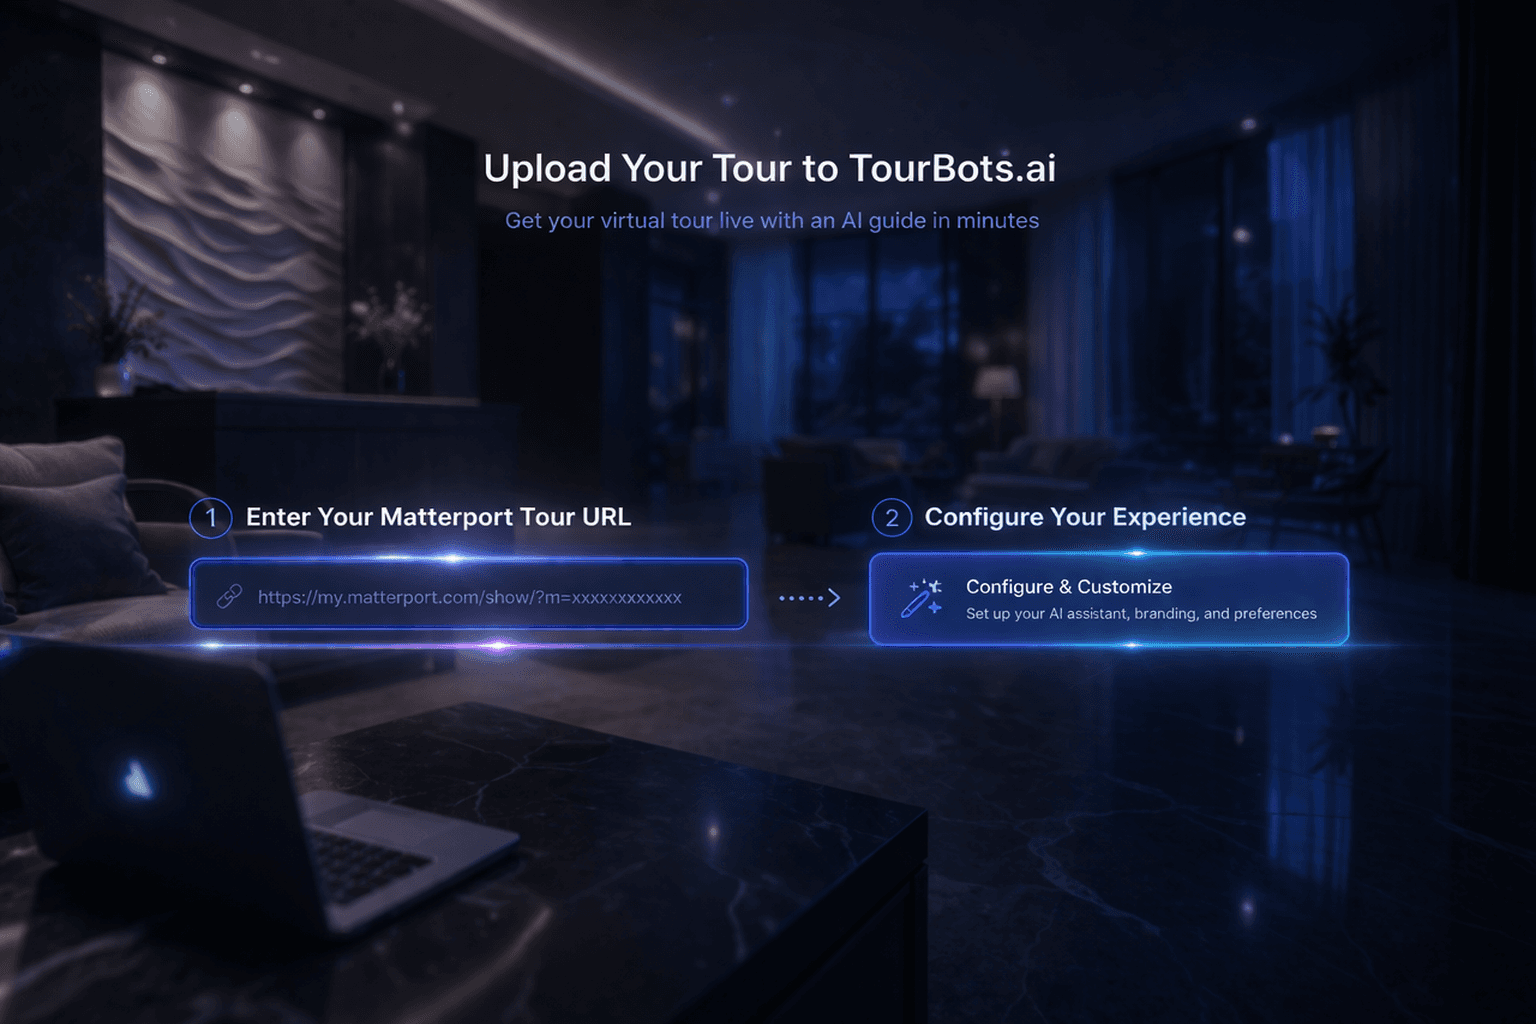
What this guide covers
This guide walks through the full first-tour setup workflow in the Tours page. You will add your first Matterport tour, validate that core controls work, and generate a live embed code for deployment.
Before you start
- You can sign in to the TourBots app.
- Your account is linked to a venue.
- You have a valid Matterport tour URL.
1) Open Tours and start first-time setup
- In the sidebar, select Tours.
- Confirm you are on the Tour Setup tab.
- In the empty state, click Upload Matterport Tour.
This opens the tour setup form for your first primary tour location.
2) Complete the Matterport tour form
In the modal, complete these fields:
- Full Matterport URL
- Matterport ID (auto-extracts from the URL when possible)
- Tour Name
- Tour Description (optional)
Click Add Tour to save.
If the save succeeds, the tour becomes active and the 3D viewer loads in the Tours page.
3) Validate your tour loads correctly
After saving, confirm the following in Tour Setup:
- The tour title appears in the tour information card.
- The Matterport scene loads in the viewer.
- The top action bar appears with controls such as model count and chatbot shortcut.
If the viewer does not load, use Try Again on the error panel and re-check your Matterport URL and ID.
4) Validate baseline tour controls
Before sharing, test the core controls:
- Open the models button and confirm model management opens correctly.
- Click Chatbot to confirm the chatbot page opens.
- Confirm Save Position and Manage Positions are visible for navigation setup work.
This confirms your base tour setup is ready for chatbot and navigation configuration.
5) Generate your first live embed code
- In Tours, open the Share & Embed tab.
- Confirm the selected tour location is correct.
- Set width, height, and chat visibility as required.
- Copy either:
- Simple IFrame Embed, or
- Advanced Script Embed
- Use Preview Tour to validate before publishing on your website.
Common issues
- Invalid Matterport URL: Use the full URL format, including the
m=parameter. - Matterport ID missing: Paste the ID manually if auto-extraction does not populate the field.
- No tour in Share & Embed: Return to Tour Setup and confirm the tour was saved successfully.
Validation checklist
- A primary tour is saved and visible in Tours.
- The Matterport viewer loads without errors.
- Core controls are available in the tour action bar.
- Share & Embed generates usable code.
- Preview opens correctly before external deployment.
Final note
Treat this first setup as your baseline configuration. Once it is stable, continue with chatbot setup, navigation points, and analytics optimisation in a controlled sequence.